Tips On Choosing The Best Laminate Flooring

How To: Clean Laminate Floors

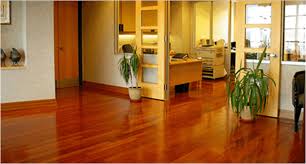
With regular maintenance and careful cleaning, you can keep your laminate floor looking shiny and new. Laminate floors are so beautiful when first installed, but over time they can start to look a little worse for wear. Of course, unsightly streaks and blemishes need not be permanent. By following these simple guidelines, you can clean laminate floors effectively and restore their original sparkle and luster.

Basic Cleaning

If you’re going to coexist happily with this particular flooring material, then you’ve got to know one thing: Laminate hates water. If you allow the flooring to get overly wet, then the installation may warp as moisture seeps between and under the boards. That said, mopping is often the best way to clean laminate floors. So how the heck do you mop the laminate surface without putting it in jeopardy?

There are two methods:

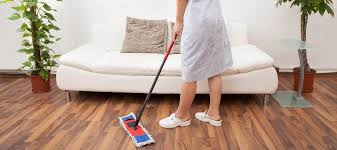
  • Use a flat mop and wring it out often; it should remain damp but never make contact with the floor when dripping wet.
  • Working in sections, use a spray bottle to mist the floor, then promptly go over with a dry mop. If the floor still looks wet a minute after you’ve mopped it, that means you’re probably using too much water.

Chemical Cleaners

When plain warm water doesn’t cut it, consider using a store-bought commercial cleanser. Take care in making your product selection, however. Some chemicals in common floor cleaners can damage laminate, so it’s prudent to double-check the packaging to be certain you are purchasing something that’s laminate-safe. Also, remember that using twice the recommended amount won’t render the floor twice as clean. Rather, the excess leaves a streaky, cloudy residue that actually makes the floor look dirty.

Stain Removal

For a tough stain that neither water nor floor cleaner can budge, try an acetone-based solution, such as nail polish remover. Apply it directly to the stain, in as small a quantity as possible. Once the solution has done its work, wipe it away with a soft, clean cloth (not with a scouring pad or anything else that could leave scratches). Another good thing to know: If you’re trying to remove a hard, stuck-on substance like wax or gum, harden it first with an ice pack, then scrape it away with a plastic putty knife.

Regular Maintenance

The least demanding, most reliable way to clean laminate floors is through light but consistent maintenance. Once a week—or as often as traffic in the room demands—sweep or vacuum the floor to control dust and debris. Given the sensitivity of laminate floors to moisture, wipe up spills swiftly after they occur.

Laminate floors shown in magazines and catalogs always shine brilliantly, don’t they? Well, yours can too! Once you’ve managed to get the floor clean, follow up with a soft cloth (or an old T-shirt) and buff the surface using circular motions to achieve a gleaming polish.

How To Clean Dust From Laminate Floors

Regular cleaning of dust can keep your laminates clean.  When dust accumulates on the laminate floor, people will trample on it, thus making it stick on the floor surface and mask the laminate floor shine. Therefore, we recommend regular sweeping to prevent dust build-up on the floor surface. Daily dust removal is the first method of making laminate floors shine. You can achieve that through the following steps:

  • Remove dirt, dust and loose debris from the floor surface by use of vacuum or a microfiber mop.
  • When using a vacuum, avoid using the hard floor attachment to prevent causing scratches on the floor. Moreover, do not use a vacuum with a beater bar.
  • Avoid hard scouring brooms as they may leave scratches on your flooring too.

Protecting Your Laminate

  • Place mats inside any exterior doorway over your Pergo floor to collect sand, gravel, or dirt tracked in the home. You can also place area rugs in other spaces for extra coverage.
  • Make sure your rugs have a solid backing, so soil doesn’t sift through the rug to come in contact with the floor.
  • Use floor protectors or felt covers on chair legs, sofas, TV stands, tables and other easily moveable furniture so you don’t scratch the floors.
  • Replace plastic casters on chairs with rubber wheels.
  • Lift, don’t slide, heavy objects across floors.

How to Restore Laminate Flooring

If you are a homeowner, you have a lot of pain about your new responsibilities. Of course, some of these responsibilities are universal to anyone, who wants to keep their home clean and fresh. Even apartment dwellers must clean their floors occasionally. So, let’s start from your floor! With this in mind, it is absolutely essential to learn how to clean and maintain your laminate floors properly. Do you want to know how to restore laminate flooring? The process isn’t fun, but there are a few tips, which can make it easier and more effective.

Prevent Pollution!

If you really want to know how to restore laminate flooring, prevent pollution! In order to keep your laminate floors looking great, you should first take steps to prevent them from being dirtied in the first place! Although laminate isn’t as easy to dirty up as carpet, you should still make sure that always take your shoes off, before entering your home. This simple jest will prevent tracking mud, dirt and other debris onto the laminate. You should also realize that sand and stones could get stuck in your shoes as much as your high heels. So, don’t forget to take your shoes off!

Also, you shouldn’t forget to place a rug or matt at the front door. It’s for your guests who aren’t going to be so responsible and clean their shoes. Giving them a rug will encourage them to wipe off their feet, before entering your home. Finally, you should make sure to protect your floors, by using runners or rubber stoppers on the bottom of furniture.

This will help to prevent your laminate from being scratched or damaged in any way.

Clean It!

When wiping up a spill, you should make sure to use a homemade natural cleaner. This combination will not only keep your home clean of dirt, but it’ll also prevent exposing your family and pets to harmful chemicals. Also, you should consider using a microfiber pad, NOT A BRUSH when cleaning your floors without chemicals. The microfiber cloth will be extra soft and will not damage the laminate. When forced to dry clean the floors, you will usually be able to get by with using a vacuum.

See, it is not difficult to keep your laminate floors perfectly clean, you should make sure to get into the habit of cleaning them every day! Vacuuming and sweeping is absolutely possible!

Just be careful! Using a flat cloth mop and a very mild spray cleaning solution each day is highly recommended. This will help to lift the dirt and debris from the laminate, without difficulty. Also, you might want to find and utilize the best vacuum for hardwood floor! This will give you the ability to quickly clean up food crumbs and other items, when needed.

Restore It!

Restoration needs special skills. Do you want to know how to restore laminate flooring? If you want to do it quickly you can hire a professional service or try to do it on your own. Let’s see!

In order to take the task on your own shoulders, you’ll need to equip yourself with the appropriate supplies. Although you can rush out to your local store and purchase some type of floor cleaner, you might want to consider making your own. Don’t worry, because you won’t need a lot of supplies. In fact, it is possible to throw together some water and a small amount of vinegar. This magic combination can be added to a spray bottle and can effectively clean your laminate floors.

Once you’ve finished cleaning the floor with the mop, you will want to make sure to clean the floors with a soft cloth or microfiber cloth. Make sure that you remove all of the standing water, because it could cause damage to your laminate.

Another effective chemical for restoring your laminate floors is hand soap and even baby shampoo! This might sound like a joke, but the baby shampoo can work perfectly and will make your laminate floors look bright and clean! This is one of the best pieces of advice you could ever find for proper laminate floor care! Try it!

How do I get my laminate floors to shine?

One of the best things about laminate floors is they look flawless and shiny. They can remain that way with proper maintenance. Still, residue and dirt buildup from unsuitable cleaning items may accumulate on laminate and reduce its quality.

The secret to restoring shine to your flooring is through the proper cleaner type. Also, stop using certain unfriendly products on the floor as soon as you can.

Step 1. Sweep or vacuum

First, get rid of dirt and dust from your floor using a mop. Laminate is a thin wood layer over synthetic medium density fiberboard. It is vulnerable to surface damage. That is why you should not use any abrasive cloths or mops.

You can vacuum the laminate, which is much more effective at gathering fine dust particles. Still, make sure you avoid scratching or dulling the floor finish by using the hard floor attachment. Say no to vacuums with the beater bar to prevent the buildup of grit and dirt.

Step 2. Use the right cleaner

The vinegar and water solution is the best homemade way to go for me. It is inexpensive and works sufficiently. I put a 1/2 and 1/2 combination of water and white vinegar in a spray bottle.

If you do not like the idea of using vinegar to make your laminate floor shine, a cleaner specifically made for this type of flooring (Bona, etc.) is another good choice. This popular product has a neutral PH level that is its advantage over vinegar, and is safe for polyurethane. Be sure you buy the Bona Cleaner instead of the polish or refresher. Those will leave shiny residues which could possibly harm your wood floor.

Step 3. Spray the solution directly onto the laminate

Importantly, spray a little at a time, especially when it comes to the vinegar solution. Never soak laminate with large amounts of liquids as allowing moisture to sit on the floor for too long could make it warp. Also, this helps you reach the whole area with the mop without walking on the wet floor.

The smell of vinegar will not bother you; it only lasts ten minutes or less.

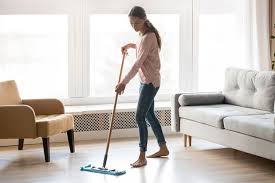
Step 4. Wipe the cleaner up with a microfiber mop

Work in small sections of the floor in the grain direction with a clean microfiber mop. Be sure you wring it out before each use. Avoid using string mops on laminate as they hold too much water which will damage the floor. Your floor surface should look moderately damp without streaks.

Spray the cleaner and mop over it until the whole floor is clean.

Step 5. Dry the laminate

Once your room surface has been cleaned and looks spotless, dry it off. If there is a large amount of water left behind, use a dry microfiber cloth to absorb it. Otherwise, let it air dry. You should not walk on the laminate while it is still wet to protect the shine.

Next, look at the dry floor in the light and check for any remaining dull spots. Rub and buff them with a dry cloth to restore the shine.

Choosing The First Dance For Your Wedding Videographer

Do You Need A Wedding Video?

It’s one of the most momentous days of your life. You’re getting married to someone you love more than anything in the world, with friends and family around you, all joining in with you to celebrate your love, and to laugh and have fun.

Regardless of whether you’ve been planning for weeks or months, you put so much your energy and creativity into making your day uniquely yours.

People will tell you that having a photographer is enough, but according to the Huffington Post, 98% of brides who don’t hire a professional videographer, wish they had. And every single reluctant bride I’ve filmed has been ecstatic that they had a film made, and was so glad they made the right decision for them.

If you’re still wondering, here’s five reasons why you really might want to budget for a professional videographer :

1. Your memories captured forever:

Your day will pass in a flash. Everything goes so fast on that day, and some special memories of the little things fade so fast unless you’re reminded of them. A wedding video captures the action from before the wedding right up to partying and the first dance in a way that photographs can’t, with sound, expresssions, movement and real emotions.

2. Getting a different perspective

You can only be in one place at a time, but a video can capture  everything, especially if you hire more than one videographer. So the groom can see afterwards the bridal preparations, as well as special moments, like your guests’ expressions of joy as the ring goes on your finger.

3. A family keepsake to treasure

Weddings are one of the few occasions all your family and friends come together and there’s something really special about being able to look back and hear and see your loved ones taking part in your special day. Especially children, who grow up so fast, but also mothers and fathers and grandparents – just imagine how wonderful it will be in decades to come  to see your family and friends connecting with each other; a moving snapshot of what they were like at that time.

4. Reliving candid and fun moments

Video has come a long way since those boring three hour videos from the 70s and 80s. Multiple camera angles, high quality sound and video capture, good quality licensed music and professional editing can give you a video you’ll want to watch over and over and that your friends and family will love as well.

5. Connecting with absent family and friends

It’s not always possible for those you really want to be there to make it, even if they wish they could. What better way to share your day with them than a  film that captures the emotion and fun of your day? Video is a great way to show them what happened, and with sound, they’ll almost feel they were there with you.

What Can a Videographer Add to My Wedding

Well, choosing to have a videographer at your wedding could be one of the best choices you will have made in your planning process. Hiring a wedding videographer can add a different dimension to your wedding day.

Many Brides tell me they feel as if their Wedding day slipped past them so fast, they didn’t have the chance to really feel involved, almost like a dream. Choosing to film your celebration can allow the Bride and Groom to relive all the delights of their day – the day they spent all that time, money and effort on.

Newlyweds also tell me how fabulous it is to see the festivities from a different angle, or maybe it’s being able to spot some fun happening or a magic moment or two. Perhaps they missed some priceless events whilst they were receiving guests or missed something whilst on other serious Bride and Groom duties. These are the important moments that guests tell you about afterward and you never even saw it. Those kinds of moments can be priceless to the whole memory of your wedding.

Brides can also miss really important arrivals too, such as their groom arriving or their treasured family or friends and it’s wonderful to be able to re-capture the day in a relaxing way – on film. Maybe snuggled up on your sofa with your new hubby and a glass of fizz!

Important moments can be priceless to the whole memory of your wedding.

A wedding videographer can capture the highlights of your celebration and bring all your special memories back to life. By having them recorded to a DVD or by easily uploading to a shared drive, you can encapsulate the essence of your wonderful day for years into the future – and for others to share too.

How a Videographer Edits Your Wedding Video

Your videographer will plan to make a fabulous story from your wedding day. Your story! Using the film he has created he’ll put together a unique story which puts you in the starring role! He or she will craft all the footage from your magical day and create a mini-movie which can be watched and enjoyed for years to come as a wonderful memory of your very special day.

As the day is ultimately about the happy couple, a professional videographer will take scene by scene of footage, with you at the center of the storytelling process.

How to Help Your Videographer Edit a Great Video

When you have your pre-wedding video interview try and give as much detail as you can about yourselves so your videographer can weave your own unique story around the fabulous live film of the day. The more detailed and emotional the better! So make sure you release your inner story-teller and really set the scene! Here are a few examples of the kinds of things you can think about:

  • Where did you first meet?
  • What was the weather like?
  • What was playing on the radio?
  • What are you both wearing?
  • What were you both thinking?
  • How you felt when you first saw each other

All those little details help your videographer to edit your footage, creating a story totally bespoke to you and a wonderful memory of your journey together.

The Typical Length of a Wedding Video

The finished length of your wedding video will all depend on how many scenes you would like your videographer to film. This will depend of course, on your budget and what kind of style you’d like your finished article to be. The traditional documentary style is usually the most commonly chosen as this will show your wedding day celebrations in the most detail and in the order the events occurred. This is what we traditionally associate with a ‘wedding video’.

As your wedding video will help to create a long lasting memory of your special day, you’ll be able to share it with friends and loved ones, send it to friends and family who weren’t able to attend to see your big day, and you will be able to watch it for years to come (through the good times and the bad!) Think carefully about your budget as your wedding video is probably one of the most important things about the whole ceremony.

There are 5 main types of edits to choose from to create your wedding video. We’ll outline the main types here and how long they generally last. The information below will help you decide. However, be sure to get in touch with us to find out about our other packages available and we’ll be happy to discuss other options with you.

The main Wedding Video edit types are listed below: –

  • Wedding day edit, – or same day edit (SDE)
  • Next day (NDE)
  • Love story or feature
  • Documentary
  • Cinematic

Take a look below at these specific type of wedding videos to get an idea of how long they generally last.

Hiring a Videographer Quality Variables

As with any purchase, the old adage ‘you get what you pay for’ is as prevalent with videography as with any other consumable. Established videographers are able to produce wedding films that include your music and also epic cinematic soundtracks which capture sound to a very high degree.

High quality, sharp and crisp video footage equal to any other form of cinematography. Modern cameras are able to excellently capture situations which have low lighting such as your evening party, so you won’t have to worry about you and guests being blinded by video lights!

Your first dance and maybe adorable footage of the mini guests enjoying themselves on the dance floor will be professionally captured.

A quality conscious Videographer will always make sure they capture all the ‘important’ traditional shots such as:

  • Groom waiting at the altar
  • Procession with Bride’s entrance
  • Vows
  • First kiss as a married couple
  • Recessional
  • First dance
  • Cake cutting
  • Bouquet Toss

Before experimenting with any other artistic endeavors, don’t worry about the techy details too much and don’t make your decision based on this. A good videographers skill, style, and creativity are far more important than how super flashy you think their camera should be.

Long Distance Moving Can Bring Order To Your Possessions

A GUIDE FOR LONG DISTANCE MOVING

When moving long distances, you lose the opportunity to stack your move across several days and multiple back and forth trips like you can when you’re moving within the same general location. A long distance move often requires one trip, and that alone can be daunting. How do you pack your things? How do you transport your items to your new home?

There are a lot of moving parts when it comes to fine-tuning your plan to move long distance, but that doesn’t mean that it becomes an insurmountable task. The best thing to do is break your move down into steps to ensure you have all your bases covered.

Get the Basics Down

The obvious first step to planning a long distance move is deciding to take the jump and move long distance. Once you decide you’re moving to a place far from your starting point, you’ll find a whole list of little details that you need to take care of to make sure that your move goes smoothly and without too many hiccups.

Make A Schedule

You’ll have a lot of dates jumbled around when it comes time for your move. You’ll have plenty of closing dates, move out dates, and move in dates to consider as you try and narrow down when you actually want to make the move to your new home. You’ll want to have plenty of cushion when it comes to leaving your old home and moving to your new one. If your move has you crossing international borders while you switch to living in a brand-new country, you’ll also need to make time to make sure you have all the appropriate paperwork completed. You’ll also need to allow time to update personal items like your driver’s license and other forms of identification.

Budgeting

Money talks, and there’s no point in denying it. Your budget will decide a lot of things for you. Making a budget will leave you room for emergencies as well as let you see what you can afford. Is it better on your wallet if you do all your own packing and moving with trusted loved ones? Or can you skip the long road trip by hiring a moving company to handle transportation and flying to your new home? Many considerations should be made when it comes to your expenses during the move. You should start with your maximum amount for the entire moving process and then start allocating proportions for various expenses including supplies, potential moving companies, and utility turn-ons/shutoffs. One of the most important points when financially preparing for a move is allowing enough padding to catch you in case of an emergency.

Ultimate long distance moving guide – step by step

Planning a long-distance move is never going to be easy. You might have heard this before, but moving takes a lot of time to prepare. So, in order to make sure that everything goes according to plan, you should make sure to plan well and plan well-ahead. Today, we are going to take you through the ultimate long-distance moving guide. No matter whether you may be moving coast to coast or you might be looking for help

By the time that we are done, you will be entirely ready and capable of preparing for a long-distance move starting right from the beginning and organizing the move up until its final phases. After all, this is what you should be striving to achieve: to save the money by completing as much by yourself as possible.

The overview of the aspects of the long distance moving

Long-distance moves are very peculiar. Why is that? Well, there are moves when all that you need to do is to pack your items, dump them into the back of your car and get going. Usually, this is something that you can do once you are moving out of your home and into a college dorm, for example. However, long-distance moves are not like that. They require a lot more organizational skills, attention to details and the help

What follows is the general division of the things that you need to be mindful of when you start preparing for your long-distance move:

How to prepare for a long-distance move

How to pack when the long-distance move comes

Carrying out the move

Moving house checklist

How to prepare for a long-distance move

As they say, preparation is the key to everything in regards to long distance moving. In order to make sure that you are going to move easily and on time, you need to prepare well. In fact, your moving preparations should begin the very moment when you find the place that you are going to be relocating to. From that moment on, all long term planning that you do should be done in regards to the forthcoming move.

Long Distance Moving Guide

Planning a move to another state, or even another country, the entire moving process is much different than simply planning a move down the street. You’re likely to have mixed emotions when moving across the country, so allow our long distance movers

Plan Ahead

Because long distance moves are major life events, the best thing you can do for yourself and your family is to plan ahead. Reach out to different full-service movers a few months before you actually move to start planning your relocation. The summertime is one of the most popular times to move to a new home, so by planning ahead you’ll have your moving slot prepared and won’t be left without a moving company to handle the hard stuff.

Establish a Moving Budget

The cost of a move directly depends on how many belongings you’re bringing, more specifically, how heavy your items are. You also have to keep in mind that costs may go up the further your long distance movers are driving. It’s important to add up all the potential costs before packing up your moving van. Unexpected things can also happen during a long distance move, as well. Fluctuating gas prices and food while traveling are two small variables you should calculate into your moving budget.

Have a Schedule

Time can slip through your fingers when you’re in the middle of a move, so it’s important to keep organized with a calendar or schedule to make sure you’re staying on target. Some chores during your moving process can take more time than others, so allot yourself the proper amount of time to pack everything. Once you know you’re moving in the summertime, you can start packing your Christmas decorations and winter clothes a couple months before the actual move.

Make Sure You’re Insured

A lot can happen while your belongings are in the back of a moving truck while it’s traveling for hundreds of miles. Before your move, it’s important to determine whether you want full-value coverage or if you would rather stick to basic coverage. If you’re unsure of which coverage will work best for you, just ask the professionals

Long Distance Movers

Ready to get quotes from the best moving companies? Simply provide us with your move details and your contact information to receive a cost estimate as well as quotes from cross country movers. For more information on the different types of movers, as well as the factors that affect a moving estimate

Why Choose a Moving Company

So why opt for a moving company over a DIY alternative? For starters, hiring a long distance mover saves you from having to do any of the heavy lifting on moving day. This, in and of itself, is the most common reason why people choose to hire professional movers. Moving company pros know how to properly load and unload moving trucks, as well as how to move furniture without scratching the floors. Choosing a reliable and affordable moving company to handle your relocation only ensures that your move will be carried out in the most efficient way possible. It also frees up valuable time and energy that you can spend on other important to-do list items on your moving checklist.

Types of Moves Within the U.S.

Moving companies usually specialize in either local or long distance moves. While many moving companies offer both local and long distance moving services, others may only be licensed to operate locally and may not be able to cross state lines. Here’s more information on what these different moves entail as well as the differences between a long distance move and an interstate move

Local Moving Companies

A move that is less than 50 miles away within the same state is considered a local move. Local moves tend to be less expensive than long distance moves. In most cases, the cost of a local move is based on the number of hours it takes to move, the number of movers it takes to relocate your belongings and any added services performed by the movers (think: packing or furniture assembly). You’ll want to hire a local mover that’s licensed and insured. Reputable local movers typically specialize in an area or city and should be able to move you as efficiently as possible. Make sure the company offers a competitive hourly rate, has good reviews from locals and has all the proper credentials. The best moving companies in your area should meet these criteria.

Long Distance Moving Companies

A move that is more than 50 miles away is typically considered a long distance move. This is true even if the move is within the same state A long distance move that is within the same state is often referred to as an “intrastate move” by professional moving companies. A move to a different state would also be considered a long distance move. However, this type of long distance move, where you’re crossing state lines, is referred to as an “interstate move.” When looking to hire a moving company for your upcoming move, make sure to check whether they offer local, statewide and/or interstate moving. If you’re looking to move long distance within the same state, then you’ll need either a licensed interstate mover or a licensed local mover that has the ability to move statewide.

LONG DISTANCE MOVING GUIDE

The moment you realize you will have to move far away from home is a scary one. That place has been your humble abode for years, maybe even decades, and the prospect of calling a new city home seems like a nightmare. Then there are those who could hardly wait to start over, and wish to get this relocation done as soon as possible. No matter which group you belong to, you will need a long distance moving guide to help you prepare for what’s to come

Start by creating a thorough plan

Surviving a long distance relocation will be a logistical nightmare. You will have to cram in a number of different tasks that need to be done, all the while making sure your daily life goes uninterrupted. It’s something that will be hard to achieve, but it can be easier if you make a good plan. Plan out the next few months down to the smallest details, and you will minimize the chance of failure.

There is a high probability that you will be tired and won’t feel like going out to buy packing supplies after the day at work you had. You will be tempted to skip it and deal with it the next day. And that’s when you’ll make an irreversible mistake.

Find good long distance movers as soon as you can

The moving industry is a lucrative one these days. In 2019 alone, the industry has garnered 12.6 billion in revenues. As much as 69.6% of that sum was earned on local and long distance moving services. Storage and warehousing brought in staggering 20.2%, packing services 7.5% and other moving services garnered as little as 2.7%. You can conclude that local and long distance movers

That’s why you don’t have the luxury of waiting for the last minute to book your mover. How does the process of finding a reputable long distance moving company work?

Start by sitting down at your computer and research the moving companies in your area.

Pay attention to their websites and the moving services they offer.

Make a short list of 3-5 candidates which seem to be satisfying all of your demands and contact them.

Request a moving quote for your particular situation.

Once you receive the quotes, compare them and choose the best option for you

Benefits Of Hiring Divorce Lawyer

What to Look For in a Divorce Lawyer How to Choose Wisely

You need to know your rights, tasks and responsibilities under the law. Just a attorney who has been maintained to represent your pursuits can encourage you. How can you really examine financial agreements in splitting up and divorcing, if you don’t understand what your rights, jobs and responsibilities are? Not knowing what your rights are can result in maybe not getting the fair share of resources, your fair share of support or your great amount of time with your children.

Properly, you could do that but things you need to understand is that until your pal is an authorized attorney, he/she is not certified to apply law. Your friend’s knowledge will soon be limited to his/her specific experience. His/her experience with what the law states is limited to the facts of his/her case and the law since it was at the time. Things change. The law changes. Any modify in the facts can modify the end result or advice. Additionally, improvements in regulations can change the advice. Your buddy simply lacks the knowledge and experience to give noise sensible legitimate advice.

The earlier you obtain a attorney, the sooner you’ll learn what you need to know to safeguard your self (and your children and house interests). Occasionally people do not know how exactly to begin identifying the issues they should examine, even when the separation is an amicable one and the events anticipate a “pleasant divorce.” A great, experienced divorce lawyer can support you in determining the difficulties you will need to discuss with your spouse to attain a comprehensive deal and world wide settlement. Over time there has been numerous occasions when we managed to point out to customers places they’d initially ignored and problems which should be included in their settlement discussions, such as living insurance, health insurance, and children’s educational needs.

So, How Do You Go About Finding A Good Divorce Lawyer? Here Are A Few Suggestions:

Ask a Lawyer

If you know a lawyer, ask him/her for a referral to a good divorce lawyer. He or she will probably know someone or several someones who devote a significant portion of the practice of law to separation and divorce and related issues. For example, I have been handling separation and divorce for 30 years and have an excellent reputation among the local legal community. Any divorce attorney worth his/her salt should have established a reputation among other lawyers. Lawyers generally know who is good for a particular type of case; they certainly know who they would see, if they were facing separation and divorce.

Speak with Several Attorney

Actually, interview several attorneys. Ask each attorney cure handles breakup in the region. When they will not provide you with names, leave work, if you notice names turning up on various lists of recommendations, the possibilities most likely good the attorney does these cases regularly.

Yellow Pages/Internet

While not a great source of information, the Yellow Pages and internet can be a beginning source of attorney names. Lawyers who do not mention separation, divorce, military divorce, and related areas like custody and support or property division, are not seeking cases in those areas and certainly don’t devote a significant portion of the practice to those areas. Be leery of ads that include a laundry list of everything under the sun. Remember the old saying, “a jack of all trades and master of none”? Wouldn’t you rather have someone who takes the time to focus at least a significant amount of time to family law, than someone who maybe devotes 3% of his/her practice to family law issues? Remember not everyone advertises in the Yellow Pages or haw a website or internet presence.. For example, there are more telephone listings than there are attorney ads in the Yellow Pages.

Make use of a Listing

I’ve outlined factors that you ought to consider when choosing the divorce lawyer.

A. Experience. The more you’ve been practicing a specific part of the law, the more knowledge you have. There’s a classic adage that states a great lawyer knows the law along with a great lawyer knows the judge! What’s the web site good lawyer along with a great lawyer? Experience.

B. Experience Trying Cases. Has he/she achieved any trial successes for his/her clients? Can the lawyer indicate situation results or client testimonial reflecting his/her abilities?

C. Respect within the legal community. What exactly are other lawyers saying relating to this lawyer? Has got the lawyer lectured or trained? Has he/she trained other lawyers?

D. Publications. Has he/she written anything that’s been recognized for publication in legal journals? This really is another manifestation of respect for that lawyer as well as for his/her experience and skills. Has he/she written or printed anything made to educate the general public regarding their legal rights responsibilities and responsibilities underneath the law?

E. Affiliations and memberships. What professional affiliations will the attorney have? Is he/she a family member Law Portion of the Virginia Condition Bar Association? Part of the Virginia Trial Lawyers? Another from the American Academy of Matrimonial Attorneys?

Relationship issues.

1. How was the phone clarified whenever you known as to have an appointment?

2. How had you been welcomed whenever you joined work? Had you been offered refreshments?

3. Did the lawyer and staff pay attention to you? Are you certain? Would you tell these were listening?

4. Had you been interrupted on your time using the lawyer?

5. Will the attorney use written contracts aiming the parameters from the representation and also the financial plans?

6. Probably the most main reasons of selecting a lawyer may be the relationship aspect: you have to be capable of working effectively and easily together with your lawyer. The connection requires closeness and trust. Do you experience feeling confident with the lawyer?

Posted inLegal

Tips On A Thorough Electrical Home Inspections And Home Testing

SCHEDULE AN INSPECTION

At various stages during construction, inspections must be performed by County staff to ensure the work has been done according to approved plans and building code requirements.

Schedule Inspections

Cancel or Reschedule Inspections

Obtain Inspection Results

Automated System for Plan Review Status and Comments

Inspections must be scheduled by 3 p.m. on the work day prior to the desired date of the inspection. When requesting information or scheduling inspections from the automated phone system, the system will ‘speak’ back to you and provide important information: the permit number, the site address, and the type of inspection.  Please listen to this information carefully for verification.

Residential One- and Two-Family (IRC) Inspections for construction of new dwelling units, additions, alterations, and basement finishing using the IRC code are in the Combination Inspection Program. The inspection codes for combination concealment (198) and combination final (199) are under the Building heading.

To Schedule an Inspection

On the Automated Phone System press three to schedule an inspection. When prompted, enter your 6 digit IVR Pin Number, and follow the instructions to enter the inspection code from the listing below. When requested, enter your telephone number.

To Cancel or Reschedule an Inspection

You may use the automated system to cancel inspections until midnight on the workday prior to the scheduled inspection day. On the Automated Phone System, press four to cancel or five to reschedule the inspection and follow the instructions. 

Inspections

Why do you need an inspection?

Inspections are part of the approval process and are included in the permit price. Your permit is not complete until your work has passed all required inspections.

Inspectors verify that your completed work meets safety or approval standards and they can assist if you encounter problems with your project. Having permits approved and completed allows future buyers to verify that your work was inspected by The City

Remember, any work completed on your home is ultimately the owner’s responsibility. If you’re working with a contractor, setting your expectations at the beginning of the project in a written contract is a good way to protect your investment.

Please note that City inspections are different from third-party home inspections. We ensure the minimum safety standards of construction and installation are met. For information regarding third-party home inspections

Please ensure all applicable requirements are met prior to the inspection. Please note that the inspection process is dynamic and an inspection outcome depends on the construction method and site conditions at time of inspection. The information provided below is a general list of inspection requirements and is not an exhaustive list.

Inspection Services

In response to national, state, and city declarations of emergency, we are temporarily adjusting how we provide inspection services. Thank you for your understanding and patience during this time. For questions or concerns related to building inspection requests,

Building inspectors will not be performing the following in person inspections:

Any structure where a person is under self or medically ordered quarantine.

All occupied one- or two-family homes and townhouses:

All occupied commercial properties for:

Water heater change outs

HVAC change outs

Minor interior alterations, renovations additions, where the inspector will have to travel through or be in the occupied portion of building.

Boiler replacements

Remote Video Inspections may be possible for:

Basements, additions, remodels and tenant finishes of occupied building

Water heater change outs

HVAC change outs

Basement finish outs

Minor interior alterations, renovations additions, where the inspector will have to travel through or be in the occupied portion of the home.

Boiler replacements

Building inspection will continue to provide inspections for:

All commercial and residential construction projects that are not listed above, this includes but is not limited to:

All new construction

Tenant improvements or tenant finish outs

Interior alterations, renovations and additions where the inspector will not have to travel through or be in the occupied portion of the building.

Inspections necessary to maintain effective operations will be provided for all critical facilities, such as hospitals, nursing homes, Fire, Police, EOC, etc.

Inspections necessary to restore utility interruptions will be provided for essential utilities, such as electrical, gas, water and sewer services.

Inspections will be provided to address structural concerns resulting from incidents such as explosions, fires, vehicles hitting buildings, etc.

Exterior weatherization of building envelopes, such as roofs, veneer, cladding, windows, doors, etc.

Electrical Permits

The purpose of the electrical permit issuance and electrical inspections is to protect the health and safety of people and property from the danger of electrically caused shocks, fires and explosions; to establish a procedure for determining where and by whom electrical installations are to be made; and to ensure that the electrical installations and electrical products made and sold

The Building Codes Bureau provides an Electrical Information Pamphlet to assist in understanding the state electrical requirements. An electrical permit is required for any installation in any new construction, remodeling or repair, except as provided by Section

For information on permit requirements for alternative energy resources such as generators, solar panels, wind energy sources, etc. to power electrical installations or wired structures click here. State electrical permits are required on all electrical work performed

NOTE: Certified local governments may enforce the electrical code within their jurisdictional area. All other areas fall under the State’s jurisdiction. Contact the Building Codes Bureau or local government to determine which jurisdiction you are in.

A homeowner may wire his/her own home, garage and premises using a State homeowner’s electrical permit. Inspections are conducted by State Electrical Inspectors and permits are obtained from the bureau.

Intro To Residential Rough Inspection General

This Electrical Inspection Checklist: Residential Rough Inspection General is engineered to provide an compliant process to guide you in your safety inspections.

As a result of its frequent use, the residential home constitutes one of the more dangerous electrical locations. The sheer number of residential houses mean that fires or other problems resulting from poor wiring practices and other electrical faults pose a serious danger to the public.

The purpose of the residential rough inspection general is to begin to identify the key areas which require checking, and to make sure all electrical systems adhere to appropriate standards.

This process is editable and you can add or remove steps as you please. Each inspection-specific task contains the relevant section reference which applies to the action. It is recommended that you familiarize yourself with the standards before beginning any inspection.

As you work through the checklist, you will encounter form fields where you can enter information and notes in relation to each task. The checklist will save each entry and the data can be accessed from the overview tab on the left-hand column of your template overview

Some Home Inspection Tips For Buyers

NEGOTIATING HOME INSPECTION REPAIRS

You’ve been searching for the perfect home for weeks (or even months) and finally you found it.  The price was right, the home is in the school district that you wanted, and you can definitely picture your family living there for years to come.

The home inspection is one of the most important aspects to a real estate contract and should never be overlooked.  I’ve said it a thousand times and will probably say it a thousand more….Whether you’re buying a pre-existing home or new construction, ALWAYS get your own home inspection!

Negotiating Tip: Never talk about the plans or renovations that you have for the home to the listing agent or the seller.  This could effect negotiations with the initial price and repairs.

NEGOTIATING HOME INSPECTION REPAIRS

First of all, you will rarely find a home that is absolutely perfect and in need of no repairs.  I’ve come across 1 in 13 years, which means that the chances are good that when you go under contract on your next home, you will probably have to negotiate repairs with the seller.

DELIVER A REASONABLE OFFER

Negotiating Tip: Your offer should be based on what you have seen outside of the home inspection.  The best policy is to address the issues of repairs after your inspection has been completed.  Because the inspection is a contingency, you are not bound to the contract if you and the seller can’t come to an agreement on repairs.

What a Home Inspector Will Look For

When you’re buying a home, it’s a good idea to have a professional home inspector look over the property. This home inspection checklist may help you and your inspector discover potential issues before you buy the house.

What to Look For: Exterior

When examining the exterior of a home, here are a few things to take a look at.

Chimney

Make sure the chimney is straight and whole, with no missing bricks or mortar. According to the American Society of Home Inspectors (ASHI), you should also ask your home inspector to check the tightness of the flashing, which isthe sheet metal that prevents leaking at the point where the roof and chimney meet.

Roof

You’ll want the inspector to take a close look at the roof, but while you’re at the property, Bob Villa recommends examining the roof from a distance to see if the roofline is straight or if it dips in the middle.

Gutters

Gutters should be clean, rust-free and attached securely to the house. Watch out for bending or sagging in the middle. Be sure to check that gutters are connected to a downspout that allows water to flow away from the house, says ASHI. Most importantly, they need to drain water into a downspout and away from the structure, according to ASHI.

House Surfaces

According to Zillow, you’ll want to note if the exterior of the home, including siding and paint, is in good shape or may repairs soon. Zillow also recommends checking for any loose boards or exposed wiring.

Windows and Doors

Look for decay or rot around the frames, advises Bob Villa. Make sure there’s no broken glass, that screens are not damaged and that windows and joints are sealed, caulked and insulated properly, says ASHI.

Foundation

Make sure the home looks square from all sides with no leaning or sagging. ASHI recommends making sure there are no significant cracks and that insects cannot reach wood. And Zillow further recommends ensuring there are no trees or roots near the foundation.

Property/Grounds

Ask your inspector to look for any standing water, as this can be a common red flag for drainage issues or a septic tank issue. Look for tree branches that touch the house or loom above the roof. ASHI also recommends looking for large cracks in the driveway and walkways that may need repairs.

What to Look For: Interior

As you and the inspector move to the inside of the house, it’s a good idea to look at the following components.

Attic

Zillow recommends looking for signs of leaks, like decay or water stains. ASHI says  you should also check for signs of pests (nests, droppings, etc.).

Bedrooms, Living Room and Dining Room

According to ASHI, all floors, walls and ceilings should be stain-free and level. Test windows and doors to make sure they open and close easily and fit in frames squarely. Paint or other wall coverings should be in good shape. All electrical outlets should be covered and working properly. Check all the light switches to make sure they work.

Bathrooms

ASHI recommends testing the water pressure in showers, sinks and toilets. It’s also a good idea to check to see if fixtures and tile are attached securely and that you don’t see signs of leaking or water damage. Your home inspector can help you ensure that everything’s installed correctly and working properly.

Reasons Why Buyers Should Be Present During Their Home Inspections

Buyers are understandably ecstatic when a seller accepts their offer, and they’re eager to move forward with the purchase. But before getting to the closing table, your buyers will have a home inspection and a home appraisal.

A home inspection isn’t required, but recommended. If a buyer agrees to an inspection, they can choose a certified home inspector to conduct a thorough examination of the property and check for any problems or hidden defects with the electrical, plumbing, appliances, HVAC system, roof, foundation, etc.

This is an important stage in the buying process. Without an inspection, buyers could potentially purchase a home that needs significant repairs. But even if your buyers agree to a home inspection, they may feel it’s unnecessary to be present during the inspection. This couldn’t be farther from the truth.

They can ensure they’re getting their money’s worth

A home inspection is a non-invasive, yet thorough examination of a property. The process—which takes longer than a home appraisal—varies depending on the size of the property. Typically, these inspections take anywhere from two to four hours.

Your buyers may have secular and personal obligations, but it’s important for them to be present during the home inspection so they can ensure they’re getting their money’s worth. Buyers pay for these inspections out of their own funds, which can cost between $300 and $500. Therefore, an inspector shouldn’t rush through the process or only spend an hour inspecting a home that requires three hours to complete. By being present, buyers can shadow the inspector and check for thoroughness.

Inspectors can explain issues in-person

One benefit of being present during a home inspection is the opportunity to hear explanations directly from the inspector’s mouth. After the inspection, the inspector writes a detailed report about his findings. But sometimes, these reports can make issues seem more significant than they actually are. However, if a buyer is present and talks to the inspector, the inspector can ease some of his concerns.

Covered Home Buying Guide – Navigating a Home Inspection

Now that you’ve found your dream home, it’s time to get a home inspection done! A detailed home inspection will provide you with not only a list of problems or potential problems the home may have, but also a comprehensive assessment of the home’s systems that can help you with future upkeep or with setting budgets for future replacements. Of course, it always feels good to understand what you’re buying as well — especially when it will be your family home.

Research the Home Inspector or Home Inspection Company

It’s important that you’re comfortable with your chosen home inspector. The home inspection is your primary protection against buying a lemon and can be an ally who can help you understand all those gizmos and doodads that make a house work.

●      Choose someone who wants you present for the inspection. If an inspector doesn’t want you present for the inspection, that is a red flag, and you should place inquiries with other home inspectors.

●      Ask for a sample report. This will give you an idea of the type of detail you can expect.

●      Check review sites. Websites like Yelp, Google Maps, and Angie’s list can be good places to get a feel for the experiences others have had with a home inspector.

●      Better yet, get a recommendation. If you know someone who recently used a home inspector, ask who they used and if they were pleased. Asking for advice from your friends and neighbors on NextDoor can also be a great source for these and other recommendations.

●      Verify experience, certifications, licenses, and insurance. Much of what you’ll want to know will be on the home inspector’s website. If not, don’t be afraid to ask. You’re the customer, and these are questions they should be used to answering on a regular basis.

●      Understand costs before you commit. Is there an extra fee for inspecting wells, septic systems, detached buildings, or foundation issues? Even if these items are “extras’ you may still choose that inspection company if you feel they are the best choice — but it’s always good to know about any extra fees before the inspection.

Prices for a home inspection typically range between $200 to $500 and average just over $300. If your inspection is quoted significantly higher (or lower), ask why.

Attend the Home Inspection

Home inspections tend to be thorough, but are often glossed over by busy homebuyers. Being present for the home inspection gives context to the details on the report. Your inspector may even discuss some aspects of the home’s condition while you’re at the inspection, helping you to understand important report details.

A QUICK GUIDE TO HOME INSPECTIONS WHEN BUYING A HOME

A home inspector is an invaluable asset for protecting yourself and your investment. For buyers new to the area and those trying to facilitate a purchase from thousands of miles away, the idea of a home inspection can be daunting. Still, regardless of the hassle, it’s 100 percent worth it.

Start by Choosing Carefully

When you’re looking for an accurate assessment of the condition of the home you’re interested in, taking the time to research and choose a reputable home inspector is key. It isn’t that there are a lot of shady inspectors, but it is common to find that many of them have associations and connections to real estate agencies. What you really want is an unbiased opinion.

Know What They’re Looking For

A reputable home inspector is going to leave no stone unturned in assessing the condition of the property. Still, it’s a good idea to sit down with them and get a clear picture of all their checkpoints and bring up specific areas of concern that you might have. Along with noticing the obvious, a key role of professional home inspectors is to identify problems that could turn into bigger issues later down the road.

The Bottom Line

With all the amazing houses for sale here, there’s no reason to settle for anything that’s subpar. A professional will provide you with an inspections report that lets you feel comfortable and confident about your island home

Tax Preparation Services May Now Become Necessary

What Should Be On Your Tax Preparation Checklist?

Why should I use a tax prep checklist?

Even if you’re having a professional tax preparer complete your tax return, a tax prep checklist can definitely come in handy. Using a checklist will help ensure you have all the information and documents needed to file.

You’ll need to gather forms and documents that fall into the following categories:

  • Personal information
  • General income
  • State & local taxes or sales tax
  • Homeowner/Renter information
  • Medical expense & health insurance
  • Education expenses
  • Childcare expenses
  • Retirement expenses
  • Charitable donations
  • Alimony paid
  • Federally declared disaster
  • Tax preparation

Aside from helping you organize your documents and forms, tax prep checklists will also help get you in the right frame of mind to start filing. Kick procrastination to the curb by using your own tax prep checklist.

How should I use this checklist?

Move down the list slowly, finding documents you need and storing them safely in a folder meant for your 2019 tax documents.

Keep in mind that you may not need every form and document listed on the checklist. In fact, if you’re using the standard deduction, it may not be worth tracking down every single document on the checklist. Even if you itemize your tax deductions, you may not need every item on this list depending on your income and the expense amounts. Feel free to mark off any of these unnecessary items for you so you can focus on the forms you do need.

Once you have all the documents you need from this checklist, you’ll be ready to file. If you don’t have all the documents you need to file before Tax Day 2020 (which is now July 15), you can always file a tax extension.

What Information Do I Need Before Filing Taxes?

To file income tax returns, you’ll need a few key pieces of information including:

PERSONAL INFORMATION

This section provides information about who’s filing the taxes, who’s covered in tax returns and how to deposit the refunds.

  • Your name
  • Dates of birth for you, your spouse and dependent children
  • Social Security number
  • Bank account information, if depositing refund directly into the account

Income information

This wage and earning statements provide information about the income that you and your spouse may have received from all your employers along with income from other sources. These can include:

  • W-2 forms for you and your spouse. These forms are ideally issued before the last day of January by employers
  • 1099-MISC forms for independent contractor work
  • 1099-C forms for debt cancellations
  • 1099-R Form 8606 for payments/distributions from IRAs or retirement plans
  • 1099-G for unemployment income or state and local tax refunds
  • 1099-INT, -DIV, -B for interest and investment income
  • 1099-S forms for income for sale of property
  • Alimony received
  • Business income
  • Income from rental property
  • Miscellaneous income

Income adjustments

The adjustments to income, also known as line deductions, help you lower your tax burden by reducing your total income.

  • Student loan interest (summarized in Form 1098-E)
  • IRA contributions
  • Energy credits
  • Records of educator expenses
  • Records of alimony paid
  • Retirement plan contributions
  • Health savings account (HSA) contributions
  • Premium payments for health insurance, if you’re self-employed

Tax deductions and credits

To help lower your tax burden, the government offers a number of deductions and credits.

  • Mortgage interest summary (Form 1098)
  • Medical and dental expenses
  • Child care expenses, including the name, address and Tax ID of your child care provider
  • Adoption costs
  • Tuition expenses for dependent children (Form 1098-T)
  • Charitable contributions, including cash and non-cash donations
  • Theft losses and casualty
  • Record of business use of home such as the square footage calculation, utility expenses, the date you started using the space for a home office

Record of tax payments

The taxes you pay throughout the year can impact the amount you owe.

  • Real estate taxes paid
  • Personal property taxes
  • Estimated tax payments in the year, if self-employed
  • Taxes withheld from retirement plan distributions (Form 1099-R)

Additionally, while filing the returns, keep a copy of the last three year’s federal and state tax returns on hand to assist with the tax filing process. Businesses should keep copies of articles of incorporation to clarify how the business is structured.

How Can I Prepare for Taxes?

  • To assemble your financial information and prepare for taxes, attach a copy of the tax preparation checklist in a file folder. Remove items on  the list that don’t apply to your tax situation and add additional ones that do
  • As you retrieve and receive the documents for tax preparation, place it in the folder and check that item off your checklist
  • If you’re self-employed, print a report of your transactions for the tax year. If you’re using an accounting software, this is an easy process as you can clearly see a detailed report of your income and expenses
  • Review your year-end bank statements to make sure your financial activity is accurate and accounted for
  • As you review the report, highlight information you will need to prepare your tax return or make notes to remind yourself of something later
  • If you have any questions about the necessary information required to submit a return, it’s a good idea to consult a tax professional.

All You Need To Know About Eyes And Eye Care In Kids

Causes of blindness

An overview of the most common causes of blindness worldwide.

At least 75 percent of blindness is preventable. For many years now, LIGHT FOR THE WORLD has been working to reduce avoidable blindness. In most cases, treatment or prevention could be easy if sufficient resource were in place: by the timely administration of medication, by small routine operations, by prevention and education measures. However, many people still do not have access to treatment, medication or doctors.

Cataract

is the world’s most common cause of blindness, affecting 65 million people worldwide. This clouding of the lens may occur due to age, injury or be congenital. Cataracts can be treated by replacing the cloudy lens with an artificial one in a 15-minute operation.

Glaucoma

is the third most common cause of blindness. Glaucoma can be treated with medication and an operation, but is not curable.

River blindness (onchocerciasis)

is a parasitic disease which causes inflammation and bleeding that leads ultimately to blindness and other disabling effects. River blindness is on the retreat worldwide thanks to the widespread distribution of the drug Mectizan.

Trachoma

is the most widespread infectious cause of blindness, responsible for the visual impairment or blindness of about 2 million people. Repeated infections with the bacterium Chlamydia trachomatis cause the inside of the eyelid to scar, turn inward and painfully scratch the cornea, eventually leading to irreversible blindness. In its earlier stages, trachoma is treated with antibiotics and is preventable through improved hygiene and sanitation. In the final stage of the illness, referred to as Trachomatous Trichiasis, surgery on the eyelid is the only way to prevent the loss of sight.

Uncorrected refractive errors (URE)

About 124 million people are visually impaired due to uncorrected refractive error. In most cases, vision can be restored with spectacles. In Uganda, LIGHT FOR THE WORLD together with the Brien Holden Vision Institute has successfully initiated a National Programme giving poor people access to high quality, tailor-made spectacles.

Childhood blindness

Around 1 million children are blind and about 19 million visually impaired due to causes like uncorrected refractive errors, Vitamin A deficiency, cataract or injury.

Prevalence

Globally, 1 billion people have a vision impairment that could have been prevented or has yet to be addressed.

This 1 billion people includes those with moderate or severe distance vision impairment or blindness due to unaddressed refractive error (123.7 million), cataract (65.2 million), glaucoma (6.9 million), corneal opacities (4.2 million), diabetic retinopathy (3 million), and trachoma (2 million), as well as near vision impairment caused by unaddressed presbyopia (826 million) (1).

In terms of regional differences, the prevalence of distance vision impairment in low- and middle-income regions is estimated to be four times higher than in high-income regions (1). With regards to near vision, rates of unaddressed near vision impairment are estimated to be greater than 80% in western, eastern and central sub-Saharan Africa, while comparative rates in high-income regions of North America, Australasia, Western Europe, and of Asia-Pacific are reported to be lower than 10% (2).

Population growth and ageing are expected to increase the risk that more people acquire vision impairment. 

Strategies to address vision impairment

Effective interventions are available for health promotion, prevention, treatment and rehabilitation to address the entire range of needs associated with eye conditions and vision impairment across the life course. Some are among the most feasible and cost-effective to implement. For example, uncorrected refractive error can be corrected with glasses while cataract surgery can restore vision. Vision rehabilitation is also effective in improving functioning for people with an irreversible vision impairment.

What is sudden blindness?

Sudden Blindness is a condition when you suddenly find it difficult to see. People think that sudden vision loss is the same as complete blindness. However, they are not the same. You might experience blurry vision. You might feel like you are suffering from a sudden loss of peripheral vision. Else, you might even feel like a sudden loss of your central vision. All of these three problems fall under Sudden Blindness. The duration of Sudden Blindness can vary. It may last for only a few seconds or many hours. There is a chance that Sudden Blindness may be permanent if treatment is not received at the appropriate time.

PREVENTION OF BLINDNESS

Blindness can be prevented if you get your eyes checked regularly. Periodic eye examinations will ensure you are treated early in case you have any eye problems or in case of any sudden occurrences. This can prevent you from losing your vision. When you are diagnosed with a certain type of eye disease, then following your ophthalmologist’s instructions about what care needs to be taken are of high importance. This can help treat your problem. At any point, if you feel like you are suffering from blindness or any type of vision loss then you should make an appointment with your ophthalmologist at the earliest to ensure speedy treatment.

You must get your children’s eyes checked when they are 6 months old and then when they are 3 years old. When they turn 6 years old, you should get their eyes checked once a year to ensure their eyes remain healthy and they have no trace of blindness. However, if you feel like they have symptoms of eye disease or any eye problem, then it is best to get their eyes checked by an ophthalmologist at the earliest. Waiting for the eye problem to go away on its own is never the solution and it can lead to permanent vision loss for children. This is why contacting an ophthalmologist is mandatory.

Some forms of blindness occur due to improper diet or diet lacking nutritional value. In such cases, blindness can be prevented by ensuring you are taking a proper diet. Proper eye protection can reduce the chances of you being blind. When an eye problem is detected early, blindness can be prevented as long as you take the necessary precautions suggested by your ophthalmologist. For instance, when glaucoma is detected early, on-time & appropriate measures can be undertaken to prevent blindness. Your ophthalmologist is the one who can best tell you which form of treatment is most suitable for you according to your case.

You should focus on eating foods that are low on sugar levels if you have diabetes. Managing your diabetes and controlling your blood sugar levels will help prevent blindness that can be caused due to diabetes. Proper exercise and maintaining a healthy weight is good for your overall health and your eyes too. You should focus on healthy habits and avoiding anything that raises your risk of becoming blind in the future. While some things might be out of your control, you should focus on things that you can control. You should ensure that if you are obese, you work towards getting healthier as a healthier weight decreases the risk of any type of blindness.

It is important to remember that some forms of blindness occur as people continue to live longer than their predecessors. While no prevention measures are available for such causes of blindness, research is continually being carried out.

What Are Signs and Symptoms of Blindness?

Symptoms of poor visual acuity may range from trouble focusing to glare to difficulty perceiving light.

Markedly constricted visual fields are seen in conditions such as advanced glaucoma and pigmentary retinopathies. In these cases, despite a small central area of relatively clear vision, the surrounding severe peripheral vision loss results in tunnel vision that can be disabling.

People born with sight who later lose vision can still form images in their mind. However, in people who lose sight due to damage to the portions of the brain that process visual input, there can be a loss of ability to form images in the mind. This is the case with trauma or strokes affecting the occipital cortex of the brain.

Most blindness is unassociated with physical pain. However, angle-closure glaucoma and various infectious and inflammatory eye disease can cause both pain and severe visual loss.

In most cases of blindness, there are no outward signs evident to others. In some cases, however, a rhythmic back and forth motion of the eyes (nystagmus) occurs in some forms of congenital blindness (blindness from birth). When one eye has poor sight relative to the other, it may wander and be misaligned relative to the eye with good sight. This misalignment is called strabismus. The most common cause of visual loss in one eye in children is amblyopia associated with strabismus or an uncorrected high refractive error. Eyes with inflammation may appear reddened. Corneal scars and swelling can appear as a grayish patch. Eyes with a dense cataract may have a visible white color in their pupil. Blind eyes with long-standing severe inflammation can also shrink in size (phthisis).

Knowing about silent eye diseases

  • Age-related macular degeneration, diabetic retinopathy, glaucoma and cataracts have no early symptoms and usually don’t cause pain. As a result, they can develop without any indication that something is wrong. The only way to find these diseases early is with regular eye exams conducted by a skilled ophthalmologist. Although most of them are degenerative diseases without a cure, early detection can lead to treatments that can slow their progression.
  • Age-related macular degeneration: Nearly 11 million people in the United States suffer with Age-Related Macular Degeneration, approximately the same number of people who have been diagnosed with all types of invasive cancer. This disease causes loss of center vision that is required to see things that are straight ahead. There are no symptoms in the early stage of the disease. However, in the intermediate and late stages of the disease there is vision loss.
  • Diabetic retinopathy: Diabetics may begin to experience vision impairment due to this disease. It is a result of diabetes and is caused when blood vessels in the retina change. Taking care of diabetes and controlling blood sugar can help to avoid this disease.
  • Glaucoma: This disease gradually reduces your peripheral vision. It has no early symptoms and therefore is called the “Silent Thief of Sight”. Glaucoma is one of the most common chronic eye diseases for seniors and is the leading cause of blindness for those over the age of 64. Half the people with glaucoma do not know they have it.
  • Cataracts: Cataracts cause cloudy vision as the lens of the eye begins to harden. Cataract surgery removes the old lens and inserts an artificial lends to restore vision

Deep Cleaning Wet Or Dry

The ultimate guide to deep cleaning your bathroom

simple tips to a super clean bathroom

1. Open the windows

Before you pick up a sponge, open all the windows to let the fresh air circulate.

2. Clear everything

That’s right, everything – from towels, bath mats, shower curtains and liners, to freestanding furnishings, shower caddies and anything on the countertops and shelving. Now you only have clear surfaces to work with.

3. Put on a wash

Toss your shower curtains and liners into the washing machine using regular detergent and a warm and gentle setting, along with your towel and bath mat, which act like scrubbers and prevent the plastic from crinkling. Add ½ cup of chlorine bleach and ¼ cup of detergent to help clear dirt, soap scum and mildew stains.

4. Allow things to soak

Start the deep clean process by pouring a cup of bicarb soda down the toilet bowl. Got rings around the tub? Try placing paper towels soaked with white vinegar on any stains and any hard water or mineral deposits around faucets and drains. Leave for at least 15 minutes before going in for the scrub. A piece of dental floss can help you get into those hard-to-reach crevices.

5. Get scrubbing

Stains, be gone! How you clean your bathtub depends on what it’s made from. For porcelain, you can get away with abrasive powders such as Ajax and scouring pads and pumice stones. If enamel, try bleach-free commercial cleaners. And if acrylic, use white vinegar, soft sponges and other gentle solutions.

6. Don’t forget the shower head

Your shower head can harbour infectious bacteria known as mycobacterium avium, a nasty bug linked to lung disease. To clean, pour a generous amount of white vinegar into a plastic bag and secure over your shower head using a rubber band. Leave it to soak overnight and then remove the bag and rinse in the morning.

7. Don’t forget your toilet brush

Take your toilet brush, place over the toilet bowl and pour bleach over the bristles. Allow it to stand for a few minutes before rinsing it with a cup of cold water. And don’t forget to rinse the canister out with hot, soapy water, too – pouring the dirty water down the toilet and not the sink.

8. Remove the exhaust fan cover

One of the most neglected areas of the bathroom are exhaust fans, despite them being a hot spot for airborne particles. Flip the switch and remove the cover, then soak in warm water and detergent. Wipe the blades and get into the crannies with a stiff paintbrush. Leave to completely dry before reattaching it. And another tip! Always run the fan during and for 30 minutes after your shower to reduce mould and mildew.

9. Sweep the floors

Dry sweep the bathroom floors to clear dirt, dust, hair and other bits and pieces you’d rather not swish around as you clean. Make sure you clean from top to bottom so any debris that falls will be wiped away.

10. Wet wash the floors

Use a wet cloth, if your bathroom is small, or a mop if big. Work from the far corner toward the door. Leave to dry before you enter again to place everything back.

11. Steam clean the walls and ceilings

Spray walls and ceilings with all-purpose cleaner, then blast hot water in the shower and close the door, allowing the steam to build. Leave to steam clean for 20 minutes before wiping down all the surfaces with a clean, dry microfibre cloth. And don’t forget to wipe the towel bar with an all-purpose cleaner – it tends to harbour a lot of bacteria.

12. Get a shiny, fog-free mirror

To clean your mirror (and any glass surface, for that matter), use coffee filters soaked in window cleaner or white vinegar. They’re cheap – and won’t leave any streaks or lint. To keep it fog free, rub a dry bar of soap onto the surface and buff it with a clean microfibre cloth until you can no longer see any marks.

Your Lazy Day Guide To Cleaning

Life is busy, and sometimes we just don’t have the energy, time or desire to give our homes the attention they deserve. That’s why lazy day cleaning tips can really provide a lifeline. By cleaning a little every day, or just doing the bare minimum, life’s messes tend not to be so messy when the times does come for a real, deep clean. Try these handy hacks to keep your home tidy all week long.

Do one chore first thing in the morning.

Make your bed, gather all your dirty laundry or clear the table; choose one chore that’s going take two minutes or less. You’ll not only cross one chore off your list, but you’ll set a great tone for the day.

Prioritize.

Decide which rooms you need to focus on first – usually the kitchen, main bathroom or living room – and forget about the ones no one will see. Your task will seem way more attainable and if you finish up the mains quickly, you can always tackle those low-priority rooms.

Clean for a set amount of time.

Tell yourself you’re going to clean for 15, 30, 45 minutes and stick to it. Put down the phone, turn off the T.V. and throw your energy into your task list. This is a great motivator for those that aren’t sure when they’re “done” or for those that lose focus.

Start the day with an empty dishwasher.

Run your dishwasher after dinner and unload it before you go to bed. Dirty dishes immediately go into the dishwasher throughout the day, instead of the sink or stacked on the counter.

ultimate guide to deep cleaning your bathroom

There’s nothing quite like a sparkling, pristine bathroom, after all, it is where you get clean. But how exactly do you give it a professional clean? Running a squeegee down the sides of the shower does a great deal of good, but every now and then a proper deep clean is in order

Wipe the windows – reaching every corner

A steam cleaner works wonders on the rubber sills and tracks of your windows. A couple of blasts with the steam, followed by a wipe down with a paper towel, will work wonders. If you don’t have a steam cleaner, try applying a paste made from bicarb soda and white vinegar, leaving it an hour, and then scrubbing it using a toothbrush.

Toss out any unnecessary products

Worried to see what lurks under your sink? Time to give it a good clean out! Consolidate products, toss out what you don’t need and put items back on a shelf liner.

Keep it up

Daily once-overs – wiping down the condensation from your shower and mopping the floors, for example, will take the pain out of your next clean, trust us!

Post Lockdown Cleaning and Disinfecting

In light of the government’s revised guidelines for a phased approach to reopen closed businesses, following the Coronavirus lockdown procedures, we have created a range of documents to help and guide our customers and product users.

The government’s task forces are looking at sectors including pubs and restaurants, recreation and leisure, places of worship and schools. The existing measures in place will be constantly under review and will be monitored so the spread of the virus is controlled.

If a business, or school, is to reopen, there are considerations relating to social distancing, more frequent disinfection of hand-touch surfaces and, of course, hand hygiene. Employers may need to update their risk assessment relating to any products used in the control of Coronavirus

Research has shown Coronavirus is able to survive in the environment on surfaces, e.g. wood, plastic, glass and cardboard, from between 24 hours and 9 days (dependent on conditions e.g. temperature and humidity).  If a building has been closed for the duration of the lockdown period, it is unlikely any virus would be present on surfaces. However, for staff, customer and pupil confidence it may be advisable to follow existing hygiene programmes for cleaning and disinfecting all surfaces.

Below you will find links to our Coronavirus guides and related wallcharts. Please follow the instructions and recommendations in these documents, paying particular attention to dilution rates/contact times and any safety advice.

Cleaning and disinfection

General guidelines for cleaning and disinfecting

The following general guidance applies to cleaning areas soiled with faeces or vomit during an outbreak. The environmental surfaces need to be cleaned free of vomit or faeces using a neutral detergent and warm water prior to disinfecting with bleach solution.

Clean soiled areas

Isolate the area where a vomiting or diarrhoea incident has occurred.

Wear disposable gloves and a mask.

Absorb and remove as much of the vomit/faeces as possible with disposable paper towels or disposable cloths.

Discard the disposable paper towel or cloth into a leak proof plastic bag.

Clean soiled areas with detergent and warm water using a disposable cloth and discard immediately into a leak proof plastic bag.

Discard used gloves and apply clean gloves before disinfecting the soiled areas.

Disinfect soiled areas

Use freshly-made bleach solution and follow manufacturer’s instructions for appropriate dilution and use (see below for dilution instructions).

Wipe the area with bleach solution with disposable paper towels or a disposable cloth.

Dispose of gloves and mask in a leak proof plastic bag.

Wash hands thoroughly using soap and water and then pat dry using a disposable paper or single cloth towel. If water is unavailable, decontaminate hands using an alcohol-based rub or gel.

Preparation of disinfection solution

Household bleach comes in a variety of strengths of the active ingredient—hypochlorous acid—and you can find this information on the product label.

Note:

When a disinfectant is required for cleaning, the manufacturer’s recommendations for use (usually written on container) and occupational health and safety instructions (in workplace handbook on OH&S for hospitals) should be followed.

Gloves should be worn when handling and preparing bleach solutions.

Protective eye wear needs to be worn in case of splashing.

Bleach solution should be made up daily.

Bleach should be used mainly on hard, non-porous surfaces.

Bleach can damage textiles and are corrosive to metals.

What To Do If You Find A Lone Bat In The House

How To: Get Rid of Bats

Do you have bats in your attic? Wanna get rid of them? Then keep reading and I’ll show you how to get rid of bats and how it is easier then you may think.

Just in case you’re wondering this is not a post on bat wrestling. You don’t have to don a batman outfit and physically remove the bats yourself. The process of bat exclusion, as it is called, is DIY friendly and not harmful to the bats in question which is extremely important because bats are a protected animal in most states.

While they may be protected and they provide a huge benefit by eating upwards of 3,000 insects a night, most of us don’t want them in our houses. Even though the stereotype of bats being rabies ridden rodents looking to suck your blood is a largely a farce (only about 1% of bats are rabies carriers), their feces “guano” contains Histoplasma capsulatum, a fungus associated with Histoplasmosis which is a lung infection similar to pneumonia in humans. The bats may not be a problem but their droppings certainly are, so removing them from your house and cleaning the mess is important.

Bats prefer to nest in the same spot every night and while they may migrate depending on the season and the region, they likely will return if you don’t take steps to prevent it in the future. Let’s get into the process and how to get rid of bats yourself at your house.

How To Get Rid of Bats

Bats like dark and cozy areas to sleep during the day and nest. While they don’t build a nest per se they do search out a protected area where they can sleep and give birth. Old houses make a great home for them because there are usually plenty of gaps for them to sneak in. They need only find a hole about 3/8″  to 1″ wide to squeeze through. Once they’re in, the rafters make a great place for them to hang from and get some rest.

Bats in Houses

Bat encounters in the home usually happen at the most inopportune times. One minute you’re watching the news, and the next minute, without any warning, a bat zooms through the living room. Soon the dog, cat and family are in an uproar either trying to swat or to run away from the intruder.  While this does not happen very often, if it happens to you, you’ll want to keep reading to find out more about what it means and what you should do.

Summer Visitor–The occasional lone bat that enters a house during warmer months in Maryland is usually a young bat that simply made a mistake. Their instinct leads them to investigate new areas, including the inside of houses, usually with fatal results.

If you are certain that no contact has occurred between the bat and other people or pets inside the house, then you can follow one or several of these suggestions:

Trap the bat in a room and open a window. The bat will find the opening and exit on its own.

Call a bat removal expert (wildlife control cooperator) .

NO PERMIT FROM DNR IS NEEDED TO REMOVE THIS BAT.

Put on thick gloves and wait until the bat lands on a wall to rest. Place a bowl over the bat and slide a piece of cardboard under the bowl. Take the bowl outside and release the bat.

Inspect the outside of your house for signs bats are roosting elsewhere in your house.

Winter Visitor –The occasional lone bat that is found inside the house during colder winter months is likely to be a Big Brown Bat. Big Brown Bats are the only species that can over winter in homes. The warmth of the house and/or outside temperatures can rouse these bats from hibernation, sending them in search of water and insect food.

Colonies in the House

Discovering a colony of bats living in your house can be disturbing and unsettling. The following answers to Frequently Asked Questions will help you understand the problem and guide you towards diagnosing your own situation and deciding the best course of action. These guidelines will help you effectively remedy the problem and guard against future problems.

Excluding Bats – Helpful Tips

Behavior and Biology

Most of the time bats root in natural shelters like drainage pipes, hollow trees, and caves, but can roost and breed within occupied buildings during warm weather. During the first warm days of spring, most bats leave their overwintering/hibernating sites and enter structures. Most of these bats are females preparing to birth in June and July.

Inspection

Inspect possible exit and entry points that the bats are using and any structural defects that the bats are using for entry. Common entry areas include louvers, rooflines (between the roof sheathing and the fascia boards). Openings of 3/8 inch or larger are sufficient for bat entry. Droppings on the ground, smudge marks, odor, noise can also give you a clue to their entry/exit points.

Inspect twice, at first dusk when the bats are first emerging and the second one during the daytime to find roosting areas. Unless it is unseasonably cold or rainy, bats will emerge each evening.

Inspect the roofline right before dusk. It may be necessary to position two or more people at different angles of the structure to view multiple rooflines at a time when the bats are emerging. This will reveal entry and exit points.

Bats and Rabies: Only a small percentage of bats carry rabies, but proper clothes (coveralls, hard hat and heavy leather gloves) should be worn during any bat control procedures.

We are having a problem with bats flying around our living room window and in the alcove at the front door. Our pest control company has no answers for us except for a spray that will discolor the paint on our house. At present we are using the sticky strips used for catching mice. We tacked two of them in the alcove area. After a month, we caught nine. Do you have a suggestion for us on how to discourage these flying pests from using our front porch? They leave their droppings everywhere.

We seem to have a colony of bats (at least 60-75). They have made their home in the exterior wall of our garage. How do we get rid of them? Will they stay forever or will they go away?

You need to fashion a one-way door, so the bats can come out but not come back inside. Another thing you can do is to seal the entry points at night while the bats are out. I would advise you to do this in the spring. They are nesting with the young in the fall. Many babies and females may be inside at night. Also if you provide bat houses for them in the area, they will stay around to kill all your other flying insects

Bats: advice for homeowners

Roosting habits vary by bat species. Pipistrelle bats are often found in crevices whilst other species, like brown long-eared bats, tend to need large open loft spaces. These seasonal visitors can form maternity colonies in properties from May, normally then leaving in early September. Very rarely, a bat roost will cause an issue, for example if it’s particularly large.

Bats in Houses helpline

Where necessary we may arrange for one of our experienced bat workers to visit your house if it will provide further help. There is no charge for this, and we offer the service whether you own or rent your home, as long as you live in it full time. Whilst our bat workers are able to collect information that will help to resolve the problems caused by bats, they cannot carry out any works to your building or exclude/take-away the bats.

Bats are highly specialised animals and the only true flying mammals. Long-lived and intelligent, they have complex social lives. Bats occur across, including on many of our islands – though in Shetland only as vagrants. North of the central belt, there are generally fewer bat species the further north and west you travel.

Bats have a highly advanced echolocation system that allows them to catch tiny insects and avoid obstacles, even in complete darkness. As they fly, bats produce a stream of high-pitched squeaks. By listening to the echoes, they can produce a ‘sound map’ of their surroundings.

Bat roosts – and other signs of bats

Bats are woodland animals, but many species have come to use roosting sites in buildings as the availability of natural roosting sites in trees has fallen. They have well-established traditions and tend to return to the same sites year after year.

How To Get Rid Of Bat Wings

Simple Steps to achieve well-defined upper arms

Excess weight is a quite common issue that plagues millions of people. Inner thigh fat, chubby belly, sagging buttocks – all these ‘trouble spots’ stop people from feeling confident in their own skin. Bat wings belong to this list as well. People who have flabby upper arms feel self-conscious because of the littlest things like waving. They are forced to wrap themselves up in layers of clothes and stick to long-sleeved tops even when it’s scorching hot outside. All of it takes a major toll on a person’s self-image and mental health, that is why it is so important to either accept yourself the way you are or eliminate this issue as soon as possible. Keep reading to find out how to get rid of bat wings once and for all

How to get rid of bat wings?

Bat wings are a quite common issue that has mainly two causes. It is widespread among people with excess pounds and among those who have lost a lot of weight. Many dieters find it quite challenging to get rid of bat wings. The main problem is that it is impossible to spot reduce your body fat. This case is not an exception. If you want to say goodbye to your bat wings, you should stick to expert-approved tried-and-true methods like the combination of a healthy diet, caloric deficit and regular workouts

Your diet should be well-balanced and should provide you with all the necessary nutrients. On average, an adult individual needs 2000-2500 calories a day. Fresh fruits and vegetables, whole grains, dairy, lean cuts of meat, fish, eggs, nuts and seeds are packed with essential nutrients. Olive oil, canola oil, nuts and seeds – these foods are rich sources of healthy fats that are vital for the normal functioning of your body.

Healthy diet should be combined with different types of workouts for major muscle groups. If your aim is to lose weight, it is recommended to have 35 minutes of moderate to high intensity workout per week

How to get rid of bat wings: exercises

There are slews of effective exercises that can help you get rid of bat wings. Some of them are listed below. You should perform 2-3 sets, 10-15 reps. Make 30-60-second pauses between the sets.